오늘은 Mecanum Wheel을 사용하여 Arduino 장애물 회피 자동차를 만드는 과정을 안내해 드리겠습니다.
프로젝트 개요:
이 프로젝트에서는 초음파 센서를 사용하여 장애물과의 거리를 측정하고, 감지된 거리에 따라 차량이 적절한 조치를 취하게 됩니다. 예를 들어, 20cm 이내의 장애물이 감지되면 차량은 전방향 이동을 수행하여 경로를 변경합니다.
필요한 부품 목록:
국제 (아마존):
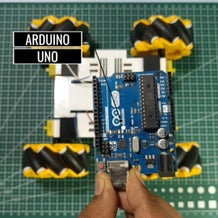
- 아두이노 우노
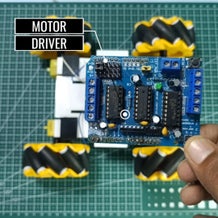
- L298D 모터 드라이버
- 초음파 센서
- 기어 모터
- 메카넘 휠
- 배터리 홀더
- 배터리 (오래된 보조 배터리에 넣으십시오)
인도 (석영 부품):
- 아두이노 우노
- L298D 모터 드라이버
- 초음파 센서
- 기어 모터
- 메카넘 휠
- 배터리 홀더
- 배터리
필요한 도구:
- 납땜 인두 키트
- 와이어커터
- 아교총
공급

프로젝트 과정:
- 기본 구성 설정: 아두이노 우노와 L298D 모터 드라이버를 연결합니다.
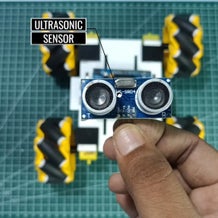
- 센서 설치: 초음파 센서를 차량 앞쪽에 설치하고 아두이노 우노에 연결합니다.
- 모터 연결: 기어 모터와 메카넘 휠을 연결하고 모터 드라이버에 연결합니다.
- 배터리 연결: 배터리 홀더와 배터리를 연결하여 전원을 공급합니다.
- 코딩 및 테스트: 아두이노에 코드를 업로드하고 차량의 작동을 테스트합니다.
1단계: Thinkercad에서 섀시 모델링
Tinkercad를 사용하여 프로젝트를 계획하고 설계했습니다. 저는 이 섀시를 세 가지 요소, 즉 쉬운 조립, 3D 프린팅 가능성, 경제성을 염두에 두고 설계했습니다. 디자인을 완성한 후 파일을 STL 형식으로 내보내 3D 프린팅 준비가 되었는지 확인했습니다. 첨부 파일에는 정확한 인쇄와 간단한 조립을 위해 필요한 모든 구성 요소와 치수가 포함되어 있습니다. 더 큰 경제성을 위해 아크릴 시트에서 섀시 프레임을 CNC로 절단하는 것도 고려할 수 있습니다.
자동차 섀시
휠 커플
모터 클립
첨부 파일

2단계: 회로 연결

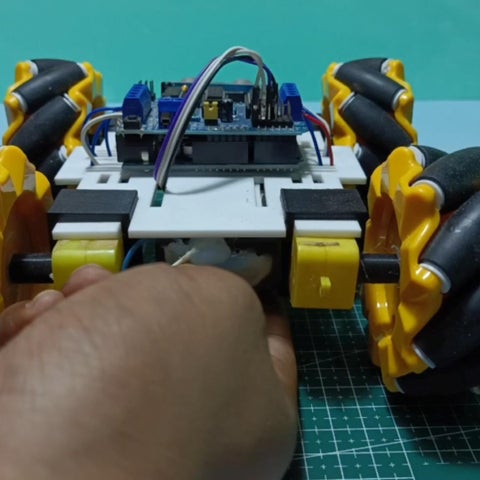
다음 단계를 수행합니다.
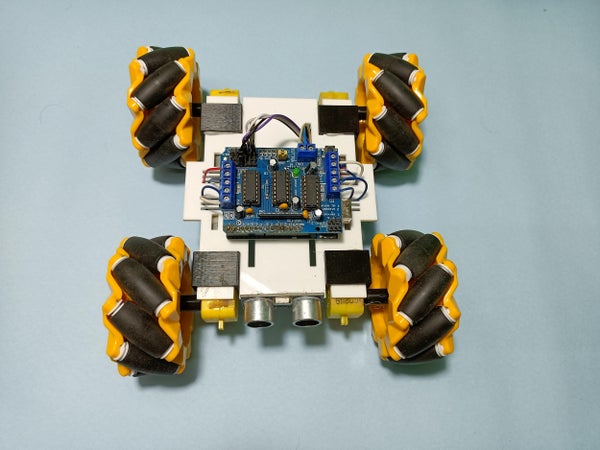
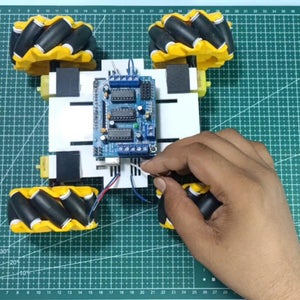
- Arduino uno 및 L298D 모터 드라이버 Sheild를 섀시에 장착합니다.
- 기어 모터 와이어를 모터 드라이버 모터 핀에 연결합니다. (회로도에 표시된 대로)
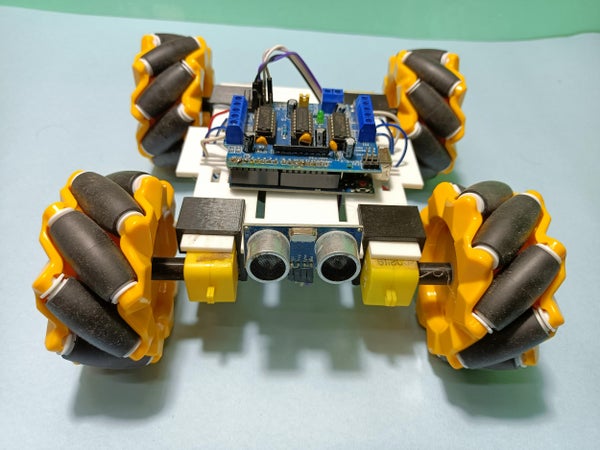
- 뜨거운 접착제를 사용하여 초음파 센서를 섀시 전면부에 조심스럽게 장착합니다.
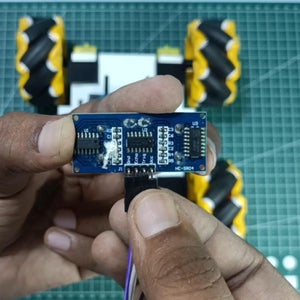
- 이미지 3의 초음파 센서 연결을 따르십시오.
- 그런 다음 이미지에 표시된 대로 배터리 홀더를 섀시에 장착합니다.
3단계: 스케치 업로드

~ USB 케이블을 Arduino Uno에 연결합니다.
~ 초음파 센서의 Echo 및 Trig 핀을 분리하여 코드가 성공적으로 업로드되었는지 확인합니다.
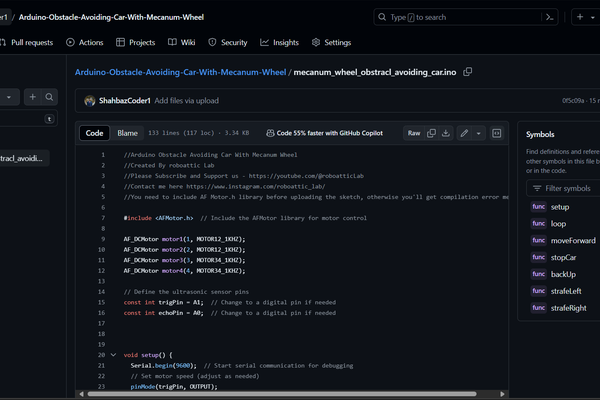
코드:
//Arduino Obstacle Avoiding Car With Mecanum Wheel
//Created By roboattic Lab
//Please Subscribe and Support us - https://youtube.com/@roboatticLab
//Contact me here https://www.instagram.com/roboattic_lab/
//You need to include AF Motor.h library before uploading the sketch, otherwise you'll get compilation error message.
#include <AFMotor.h> // Include the AFMotor library for motor control
AF_DCMotor motor1(1, MOTOR12_1KHZ);
AF_DCMotor motor2(2, MOTOR12_1KHZ);
AF_DCMotor motor3(3, MOTOR34_1KHZ);
AF_DCMotor motor4(4, MOTOR34_1KHZ);
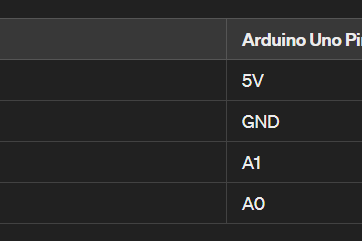
// Define the ultrasonic sensor pins
const int trigPin = A1; // Change to a digital pin if needed
const int echoPin = A0; // Change to a digital pin if needed
void setup() {
Serial.begin(9600); // Start serial communication for debugging
// Set motor speed (adjust as needed)
pinMode(trigPin, OUTPUT);
pinMode(echoPin, INPUT);
motor1.setSpeed(150);
motor2.setSpeed(150);
motor3.setSpeed(150);
motor4.setSpeed(150);
randomSeed(analogRead(0)); // Initialize random seed
}
long duration;
int distance;
void loop() {
// Get the distance from the ultrasonic sensor
digitalWrite(trigPin, LOW);
delayMicroseconds(2);
digitalWrite(trigPin, HIGH);
delayMicroseconds(10);
digitalWrite(trigPin, LOW);
duration = pulseIn(echoPin, HIGH);
distance = (duration / 2) / 29.1;
// Print the distance to the serial monitor (for debugging)
Serial.print("Distance: ");
Serial.print(distance);
Serial.println(" cm");
// Obstacle avoidance logic
if (distance < 20) { // Adjust the threshold distance as needed
// Obstacle detected - Stop the car
stopCar();
// Back up for a short time
backUp(1000);
// Turn to the left or right randomly to avoid the obstacle
int randomTurn = random(0, 2);
if (randomTurn == 0) {
strafeLeft(1000); // Adjust strafing time as needed
} else {
strafeRight(1000);
}
// Move forward again
moveForward();
} else {
// No obstacle detected - Move forward
moveForward();
}
delay(50); // Delay between readings
}
// Function to move the car forward
void moveForward() {
motor1.setSpeed(150);
motor1.run(FORWARD);
motor2.setSpeed(150);
motor2.run(FORWARD);
motor3.setSpeed(150);
motor3.run(FORWARD);
motor4.setSpeed(150);
motor4.run(FORWARD);
}
// Function to stop the car
void stopCar() {
motor1.run(RELEASE);
motor2.run(RELEASE);
motor3.run(RELEASE);
motor4.run(RELEASE);
}
// Function to move the car backward
void backUp(unsigned long duration) {
motor1.setSpeed(150);
motor1.run(BACKWARD);
motor2.setSpeed(150);
motor2.run(BACKWARD);
motor3.setSpeed(150);
motor3.run(BACKWARD);
motor4.setSpeed(150);
motor4.run(BACKWARD);
delay(duration);
stopCar();
}
// Function to strafe the car left
void strafeLeft(unsigned long duration) {
motor1.setSpeed(150);
motor1.run(BACKWARD);
motor2.setSpeed(150);
motor2.run(FORWARD);
motor3.setSpeed(150);
motor3.run(BACKWARD);
motor4.setSpeed(150);
motor4.run(FORWARD);
delay(duration);
stopCar();
}
// Function to strafe the car right
void strafeRight(unsigned long duration) {
motor1.setSpeed(150);
motor1.run(FORWARD);
motor2.setSpeed(150);
motor2.run(BACKWARD);
motor3.setSpeed(150);
motor3.run(FORWARD);
motor4.setSpeed(150);
motor4.run(BACKWARD);
delay(duration);
stopCar();
}결론:
이 프로젝트를 통해 초음파 센서와 Mecanum Wheel을 활용하여 장애물을 회피하는 Arduino 자동차를 성공적으로 제작할 수 있습니다. 이 과정을 통해 전자공학과 프로그래밍의 기초를 배우고, 창의적인 프로젝트를 완성하는 성취감을 느낄 수 있습니다. 앞으로도 다양한 프로젝트에 도전해 보세요!
여러분의 창의적인 작품을 기대하겠습니다! 🚗✨
이 튜토리얼이 유익하고 재미있었길 바랍니다. 즐거운 제작 시간 되세요! 😊
'메카넘 휠 로봇' 카테고리의 다른 글
| 메카넘 로봇 - MKBUMBLE: 전방향 이동 로봇 프로젝트 🚀 (2) | 2024.12.12 |
|---|---|
| 메카넘 로봇 - MKBUMBLE: 다재다능한 전방향 이동 로봇 프로젝트 🚀 (1) | 2024.12.12 |
| 마이크로 컨트롤러 V의 555 타이머 - 모터 속도 컨트롤러 대결 (4) | 2024.09.30 |
| 메카넘 휠 설정 및 동작 (0) | 2022.12.17 |
| 메카넘 휠 로봇 - 블루투스 제어(mecanum wheel robot) (1) | 2022.12.12 |


